
How to Use a Plunger
Using a plunger is a simple and effective method for clearing clogs in sinks, toilets, and drains. When faced with a clogged toilet or sink, a plunger can be your best friend. This humble tool can help you resolve minor plumbing issues without the need for professional assistance. In this guide, we’ll walk you through the step-by-step process of using a plunger effectively. So, the next time you encounter a stubborn clog, you’ll be well-prepared to tackle it on your own. Here’s a step-by-step guide on how to use a plunger:
Before You Begin: Gathering Supplies and Identifying the Clog
Before diving headfirst into unclogging your toilet, it’s crucial to gather the right tools and identify the nature of the clog. Here’s what you’ll need:
1. The Right Plunger: Invest in a high-quality plunger, specifically a cup plunger. This type features a rubber cup at the end, designed to create suction and dislodge the most common clogs. Skip the accordion-style plungers, as they’re not as effective for toilet clogs.
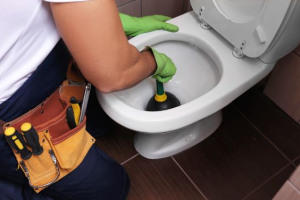
2. Protection for Your Hands: Hygiene is key, so do the rubber gloves. They’ll shield your hands from potential contact with germs and unpleasantness during the process.
3. Identifying the Clog: Before you unleash the plunging power, take a moment to understand the clog’s severity. Here’s how:
- Partial Clog: If your toilet water drains slowly but doesn’t completely stop, you’re dealing with a partial clog. This is the ideal scenario for tackling the problem yourself using a plunger.
- Full Clog: If there’s no water draining at all, and the toilet bowl overflows quickly when you flush, you’re facing a full clog. In this case, it’s best to call a professional plumber as attempting to fix it yourself might worsen the situation.
For more information visit our website urbansoutfitter.com
Preparing the Area for Effective Plunging
Before wielding the plunger with a valiant effort, it’s essential to prepare the workspace for a smooth and effective unclogging experience. Here’s what you need to do:
1. Clear the Battlefield:
Remove any bathroom essentials or decorative items near the toilet base. This ensures you have ample space to maneuver the plunger freely and avoid knocking anything over in the process.
2. Enlist the Help of Towels:
Grab some old towels and lay them around the base of the toilet or under the sink. These absorbent warriors will catch any water spills that might occur during the unclogging battle, protecting your floor from unwanted moisture.
Now, let’s arm ourselves with the proper technique to conquer the clog:
Unleashing the Power of the Plunger: Technique is Key
1. Position your champion:
Place the plunger directly over the toilet’s drain hole. Ensure a tight seal is formed between the rubber cup and the porcelain surface. This prevents air from escaping, which is crucial for creating the necessary suction.
2. Seal the Deal:
Press down firmly on the plunger handle to establish a strong and complete seal. Imagine creating an airtight bond between the plunger and the drain.
3. The Plunging Dance:
Now comes the rhythmic action. Push the plunger down with controlled force and then pull it back up in a gentle and steady motion. Repeat this several times in a consistent rhythm.
4. Witness the Victory (or Repeat):
After a few rounds of plunging, check the toilet bowl to see if the water level is receding. If the water is draining freely, you’ve successfully conquered the clog! However, if the water level remains stagnant, don’t despair. You might need to repeat the plunging process with more force or consider seeking professional help for stubborn clogs.
Troubleshooting a Persistent Clog
Even the most valiant plunging efforts may not always yield immediate success. If the clog persists after several attempts, don’t fret! Here are some troubleshooting tips to help you conquer the blockage:
1. Ensuring a Proper Seal:
Double-check that the plunger forms a tight seal around the drain hole. Any air gaps can significantly reduce the effectiveness of the plunging action. Press down firmly on the plunger handle to create a complete and airtight bond.
2. Enlisting the Help of Water:
In some cases, adding more water to the toilet bowl can be beneficial. The additional water level can help create more pressure and dislodge the clog. However, avoid overfilling the bowl, as this could lead to overflows and unwanted messes.
3. Cleaning Up After the Battle:
Once you’ve tackled the clog, it’s time to clean up. Properly dispose of any debris that may have been collected on the plunger, following appropriate hygiene guidelines.
4. Keeping Your Plunger Battle-Ready:
Finally, don’t forget to sanitize the plunger after use. Wash it thoroughly with warm water and disinfectant to ensure it’s clean and ready for future plumbing emergencies.
Why Use a Plunger?
Before we dive into the specifics, let’s understand why using a plunger is a preferred method for unclogging drains. Plungers work based on the principles of air pressure and suction, making them an effective and eco-friendly solution.
Additional Tips for Plunger Success
For those seeking further mastery of plunger techniques, here are some additional tips that can help ensure success:
Choose the Right Plunger
Different types of plungers serve different purposes. A cup plunger is great for sinks and toilets, while a flange plunger is more suitable for toilets with irregular shapes. Be sure to select the appropriate plunger for your needs.
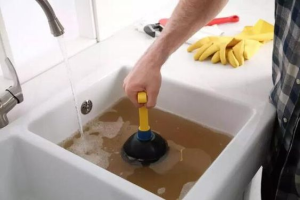
Lubricate the Plunger
Applying a small amount of petroleum jelly to the rim of the plunger can help create a better seal and improve suction, making your plunging efforts more effective.
Use Boiling Water
In some cases, pouring boiling water into the clogged drain before plunging can help break down the blockage. This can be particularly useful for grease-related clogs.
Plunge at an Angle
For toilet clogs, it can be helpful to plunge at a slight angle. This allows the plunger to create a better seal and apply more pressure.
Maintain a Steady Pace
When plunging, maintain a steady rhythm. Avoid using excessive force, as this can cause water to splash. Slow and steady wins the race when it comes to plunging.
Regular Plunger Maintenance
Taking care of your plunger is just as important as knowing how to use it. Proper maintenance ensures its longevity and effectiveness for years to come.
Rinse and Dry
After each use, rinse the plunger thoroughly with hot water. This helps remove any residue and keeps it clean.
Disinfect
To maintain hygiene, disinfect your plunger by soaking it in a mixture of water and bleach. Ensure you rinse it thoroughly afterward.
Store Properly
Store your plunger in a dry area, away from direct sunlight. Plungers left in wet or sunny conditions may deteriorate more quickly.
Replace as Needed
Over time, the rubber on the plunger may wear out, reducing its effectiveness. Be prepared to replace your plunger when it shows signs of wear and tear.
The Importance of Plunger Safety
While using a plunger can be a straightforward task, it’s essential to keep safety in mind:
Protective Gear
Always wear rubber gloves when handling a plunger to protect yourself from any potential contaminants.
Ventilation
Ensure proper ventilation in the bathroom or kitchen while working. This helps to avoid inhaling any unpleasant odors that may arise during the unclogging process.
Conclusion
Using a plunger is a handy skill to have for dealing with minor plumbing issues. With the right technique how to use a plunger and some patience, you can often resolve clogs on your own. Remember to always use a high-quality plunger and maintain a clean, hygienic environment.
Frequently Asked Questions
1. Can I use any plunger for unclogging drains?
While you can use different types of plungers, a classic cup plunger is the most effective for unclogging drains.
2. What if the water in my toilet or sink is overflowing while I plunge?
If water starts overflowing, stop plunging immediately and contact a professional plumber.
3. How often should I clean my plunger?
It’s a good practice to clean your plunger after each use to maintain hygiene.
4. Are there any eco-friendly alternatives to using a plunger?
Yes, you can try using a drain snake or a mixture of baking soda and vinegar for eco-friendly options.
5. What should I do if the clog doesn’t clear after multiple attempts?
If the clog persists, it’s best to seek professional plumbing assistance.